Building an RTMP Camera with Raspberry Pi Zero W
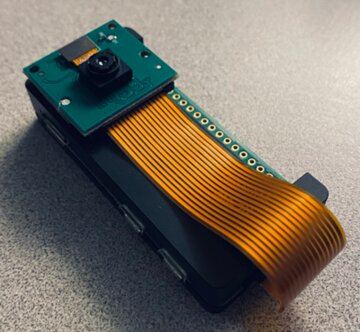
Published on December 26th 2025I've had a Raspberry Pi Zero W and a Camera Module sitting on my desk for a long time, waiting for a project. My past attempts left me defeated, as the Pi Zero simply isn't that powerful.
With the holiday break here, I decided to give it another shot.
This time, I wanted to test the feasibility of running an RTMP server and RPiCam-Vid on this low-powered Pi Zero. Here are my notes from many hours of trial and error. Spoiler: it works... sort of.
Where to start?
To get an RTMP server running, I need to install NGINX along with the `libnginx-mod-rtmp` module. This extension allows the stream to be served to clients like VLC, MPV, or Celluloid via the `rtmp://` protocol.
On the capture side, I'll be using the `rpicam` suite (formerly `libcamera`), which is the standard way to interface with the Raspberry Pi Camera Module.
The final piece of the puzzle is connecting the two: I'll need to pipe the `rpicam` video feed into `ffmpeg` to push it to the RTMP server.
It sounds simple, but I'm skeptical about the Pi Zero's performance. The real challenge will be finding the right balance: what bitrate, framerate, and resolution will actually work?
The Setup
I started with the Lite version of Raspberry Pi OS. Since the Pi Zero has limited resources, a desktop environment would be unnecessary overhead.
After flashing the OS, I went through the standard setup process: configuring localization and timezone, enabling SSH, and connecting to Wi-Fi.
Once connected, I could SSH into the Pi from my main computer, eliminating the need for a dedicated keyboard and monitor. This headless setup also makes it much easier to copy and paste commands.
1. Install Dependencies
First, install the required packages, including FFMPEG, NGINX, and the RTMP module:
sudo apt install ffmpeg nginx libnginx-mod-rtmp rpicam-apps
2. Configure NGINX
We need to replace the default NGINX configuration to enable RTMP streaming. Edit `/etc/nginx/nginx.conf` and add the following:
load_module modules/ngx_rtmp_module.so;
worker_processes auto;

events {
    worker_connections 1024;
}

rtmp {
    server {
        listen 1935;
        chunk_size 4096;

        application live {
            live on;
            allow play all;
            allow publish 127.0.0.1;
            deny publish all;
            meta off;          # Reduces overhead
            wait_key on;       # Sync on keyframes
            wait_video on;
        }
    }
}
Save the file and restart the NGINX service:
sudo systemctl restart nginx
3. Create the Streaming Service
To ensure the stream starts automatically on boot and restarts if it crashes, create a systemd service at `/etc/systemd/system/rpicam-stream.service`:
[Unit]
Description=Raspberry Pi Camera RTMP Stream
After=network.target nginx.service
Requires=nginx.service

[Service]
User=teklynk
ExecStart=/bin/bash -c 'rpicam-vid -t 0 --width 640 --height 480 --framerate 25 --bitrate 500000 --nopreview -o - | ffmpeg -i - -vcodec copy -f flv rtmp://127.0.0.1/live/stream'
Restart=always
RestartSec=3

[Install]
WantedBy=multi-user.target
Reload the systemd daemon, then enable and start the service:
sudo systemctl daemon-reload
sudo systemctl enable rpicam-stream.service
sudo systemctl start rpicam-stream.service
4. Network Configuration
Setting a static IP ensures the camera always stays at the same address. I used `nmcli` to configure the IP, gateway, and DNS:
sudo nmcli c mod "WIFI-SSID" ipv4.addresses 192.168.0.93/24 ipv4.method manual
sudo nmcli con mod "WIFI-SSID" ipv4.gateway 192.168.0.1
sudo nmcli con mod "WIFI-SSID" ipv4.dns 192.168.0.1
Apply the changes by restarting the connection:
sudo nmcli c down "WIFI-SSID" && sudo nmcli c up "WIFI-SSID"
5. Verify the Stream
Finally, test the feed from another computer using a player like MPV or VLC:
mpv rtmp://192.168.0.93/live/stream
Conclusion
I successfully viewed the stream, though it had a significant lag of about 10 seconds. While the Pi Zero's CPU usage remained manageable, I suspect the onboard Wi-Fi antenna is the bottleneck.
Ultimately, it works. I can view the video feed on my computer and even pull up the RTMP stream on my phone. This setup is perfect for non-critical monitoring tasks like watching a 3D printer or a birdhouse—scenarios where a few seconds of latency don't matter.